YOU KNOW WHAT THEY SAY: ALL GOOD THINGS MUST COME TO AN END…
But there’s no need to be sad: once you finish the Wool and the Gang CAL, you get to start using your new Carrie On Tote!
The sides of your tote bag should now be completed, so all that remains is to add all those little finishing touches. First of all, you need to finish off the last round – and here’s how to do it:
Make a slip stitch into the next stitch on the previous round – to do this, insert the crochet hook, loop the yarn, and pull it through all loops on your hook at once.

When your slip stitch is done, cut the yarn. Leave a tail approximately 15cm/6” long.

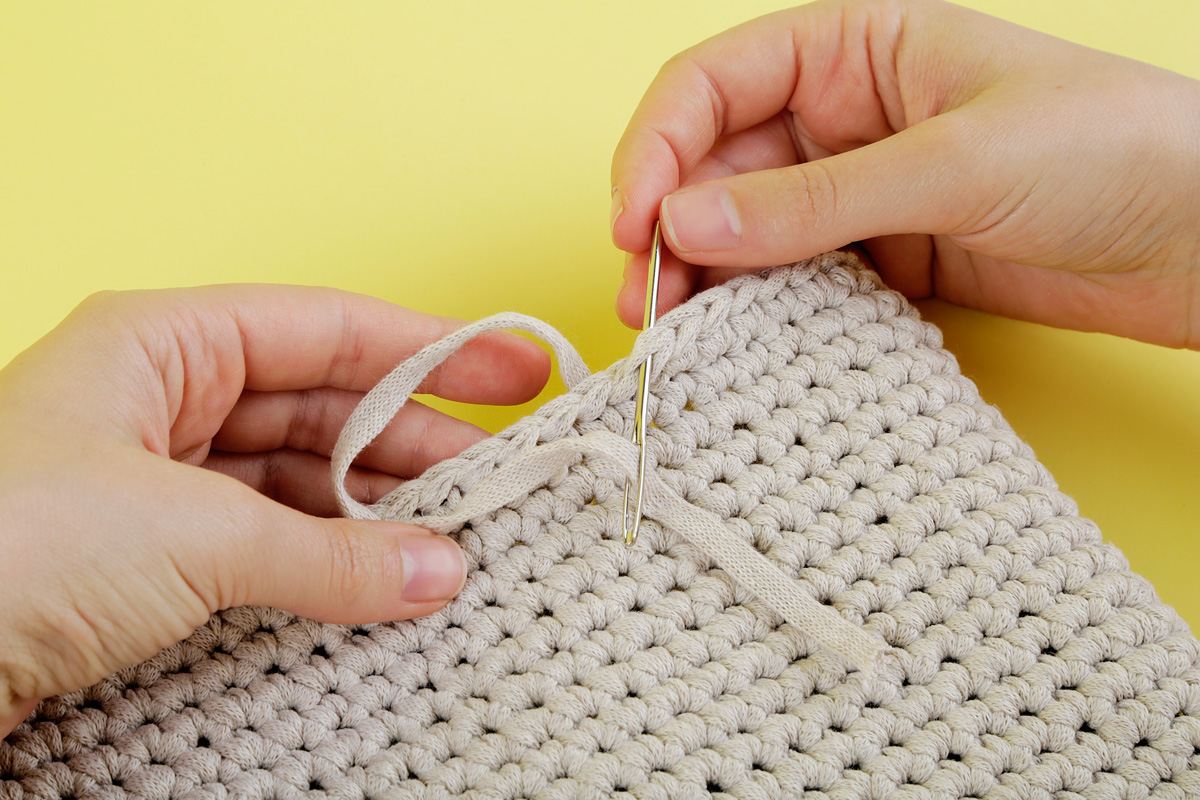
Thread your sewing needle with the yarn tail, insert it from front to back into the next stitch along the edge and pull the yarn through.

Now insert it into the previous stitch, under the back strand only. To do this, insert the needle into the top of the stitch, and let it come out at the back. Pull the yarn through, and secure the yarn tail by weaving it into the wrong side of your fabric.
The pattern gives you instructions for how to sew your leather straps on using the Mixtape yarn. To get a slightly different look (like the bag at the top of this page!), you can use some of our little stud screws for attaching your straps:

We simply inserted each end of the straps through a stitch in the crocheted fabric, doubled up the ends and used three stud screws per strap end to secure it. (That’s twelve in total, for those who aren’t so keen on maths…)
We couldn’t resist doing one final hack: an internal pocket for all the little bits and bobs we all carry around.

Here’s how to make it:
POCKET INSERT
This pocket is made as a separate piece, and attached by looping the straps through it, if using stud screws for attaching your straps. If you’re sewing your straps on, just sew the pocket on with a few stitches instead.
1. Make a foundation chain of 35 stitches.
2. Work in single crochet until your piece measures approx 35cm/14” from the foundation edge.
You will now create two loops along the top edge, so you can attach the pocket to your bag.
3. Work 4 stitches in single crochet, then make 9 chain stitches. Don’t crochet into the next 3 stitches of your row, then work in single crochet into the next 21 stitches. Make 9 chain stitches, skip the next 3 stitches, then work the remaining 4 stitches of your row in single crochet. Cut the yarn, leaving a 15cm/6” yarn tail. Pull on the last stitch until the yarn end pops through and the stitch is secured.
You now have two chain spaces (= loops of chain stitches) along the top edge of your piece. (On the final row, you will work around these loops in single crochet.)
4. Fold your piece so that the foundation edge sits approx. 4cm/1.5” below the last row you worked. You will now work in single crochet around all edges apart from the fold at the bottom. On the side edges, insert the crochet hook into the spaces formed by your rows, and complete your stitches as for regular single crochet.
5. Starting at the bottom right-hand corner, insert the hook through the first stitch from front to back. Insert the hook through both layers of fabric. Loop the yarn around the groove of the hook and bring the yarn out to the front of the pocket. Make 1 chain stitch.
Work in single crochet along the side edge, making sure you insert the hook through both layers for each stitch to the end of the folder section. Then continue working in the same way for the section that has only one layer. When you get to the last stitch of the side edge, work 3 single crochet stitches into this stitch – this turns the corner, so you’re ready to work along the top of the pocket next.
6. Work 3 stitches in single crochet. Next, you will cover the first chain space: insert the hook below the chain of stitches, close to the last stitch you worked. Complete your stitch as a regular single crochet stitch.
Make another 10 stitches in the same way. They should fit snugly along the chain space – if necessary, you can slide the existing stitches along the chain to the right to make space for the last couple of stitches.
Work 21 stitches in single crochet, then work 11 stitches around the second chain space. Work the next 3 stitches in single crochet, then work 3 stitches into the corner stitch as before.
7. Work along the second side edge as before, then cut the yarn and secure the last stitch.
8. If you want to divide your pocket into compartments, simply sew a vertical line of running stitch.
9. To attach your pocket to the inside of your bag, thread your leather strap through the loops at the top before securing the strap ends with the little stud screws.
We hope you’ve enjoyed your crochet adventure! Don’t forget to share your pictures – we love seeing what everyone’s been up to. : ) #crochetwiththegang
If you’ve missed out previous CAL blog posts don’t worry! You’ll find them all below: